
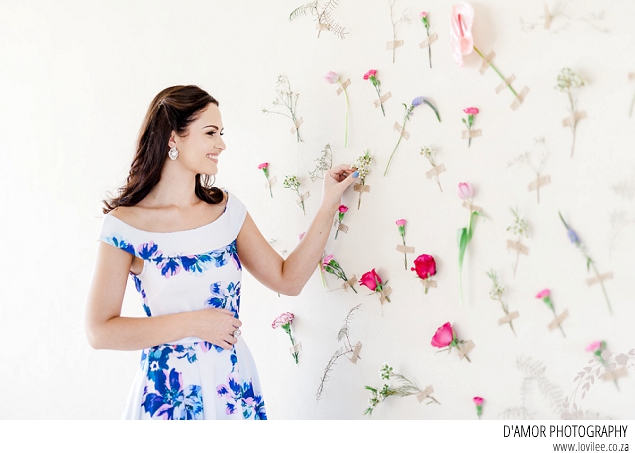
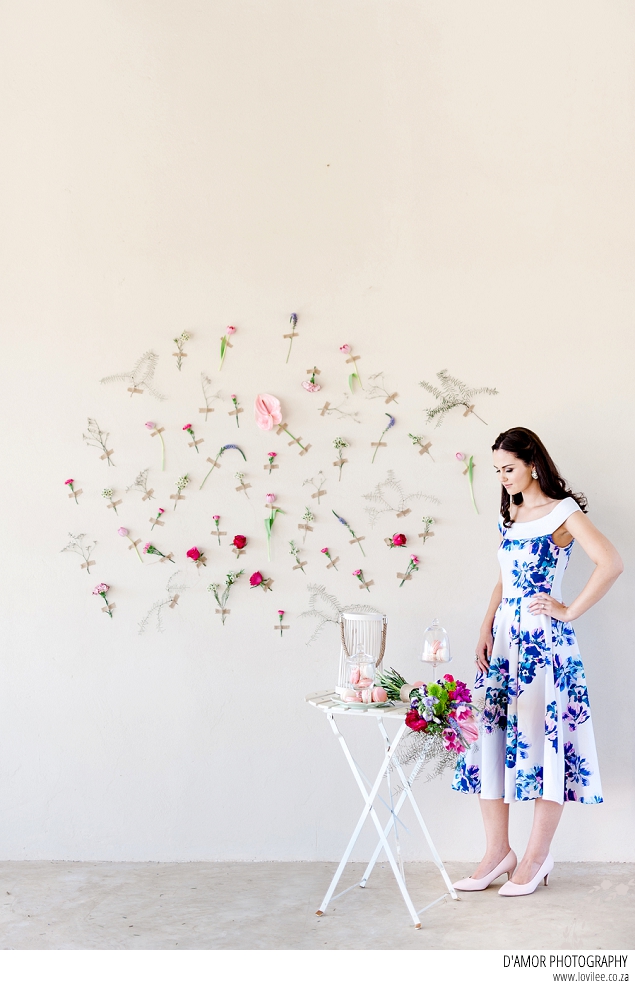
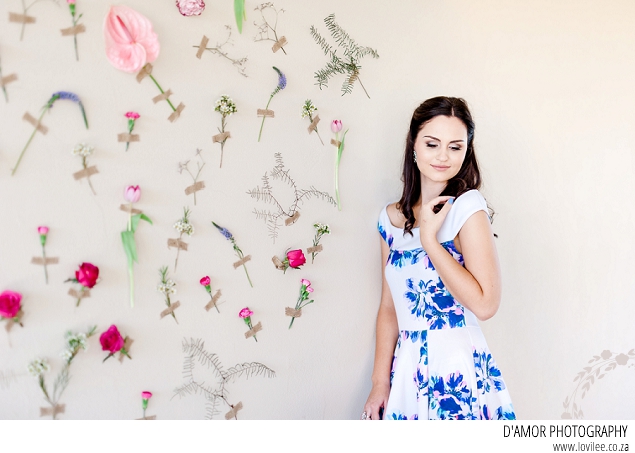
Ezalle from Myrtle Floral Design & Styling submitted a gorgeous styled shoot at Harmonie Proteas that featured a DIY flower photo wall backdrop with lovilee colours. Here with some inspiration for a special occasion or wedding day and DIY instructions on creating your own. I also did a recent fabric wall hanging that is a more permanent solution and can be re-used.

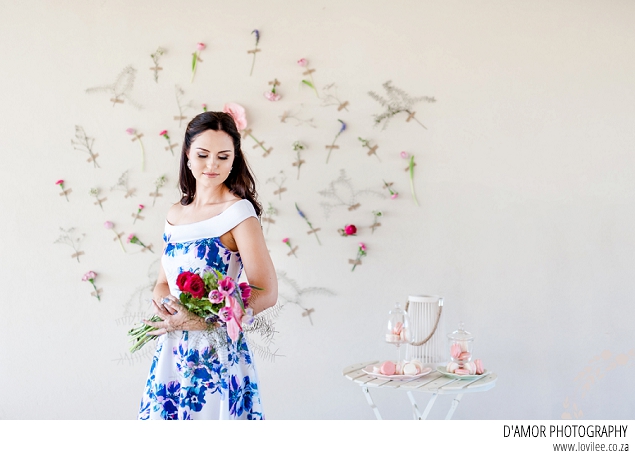
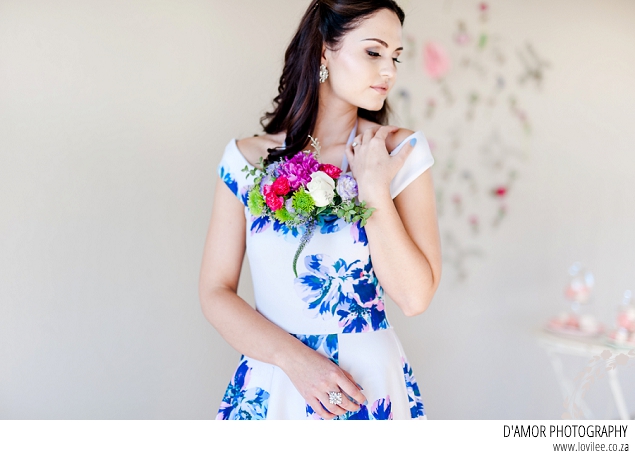
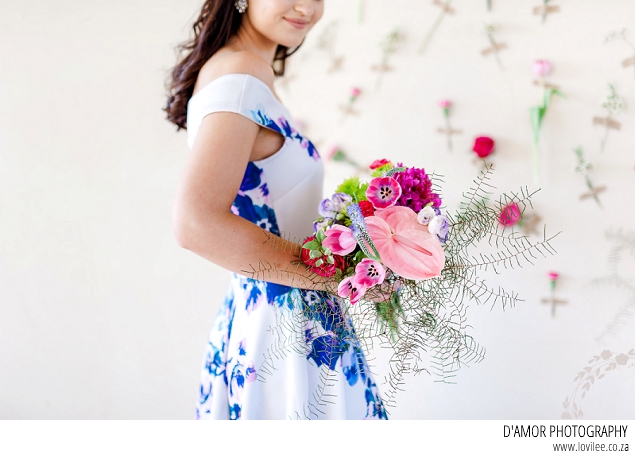
The images are part of an e-session of Carla and Heinrich, beautifully captured by D’amor Photography. The Bride-to-be wanted two looks for her Styled Engagement session. For the first look she wanted to be a bit more daring with some added color and the second look had to have a romantic look and feel with soft corals and pinks. Today we share the first look. Her hair and make-up was done by Missy vd Walt from Missy Makeup Artistry.
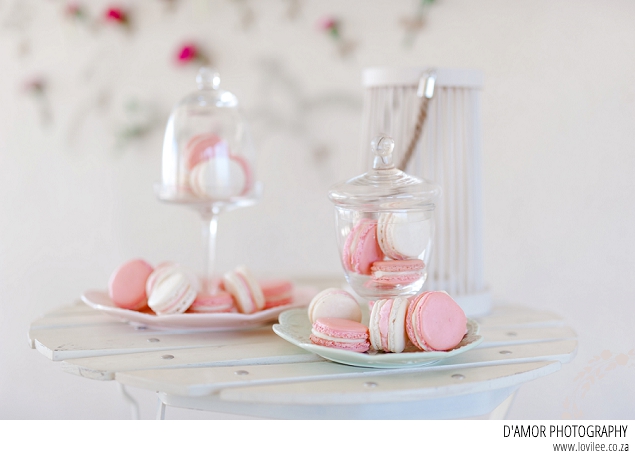
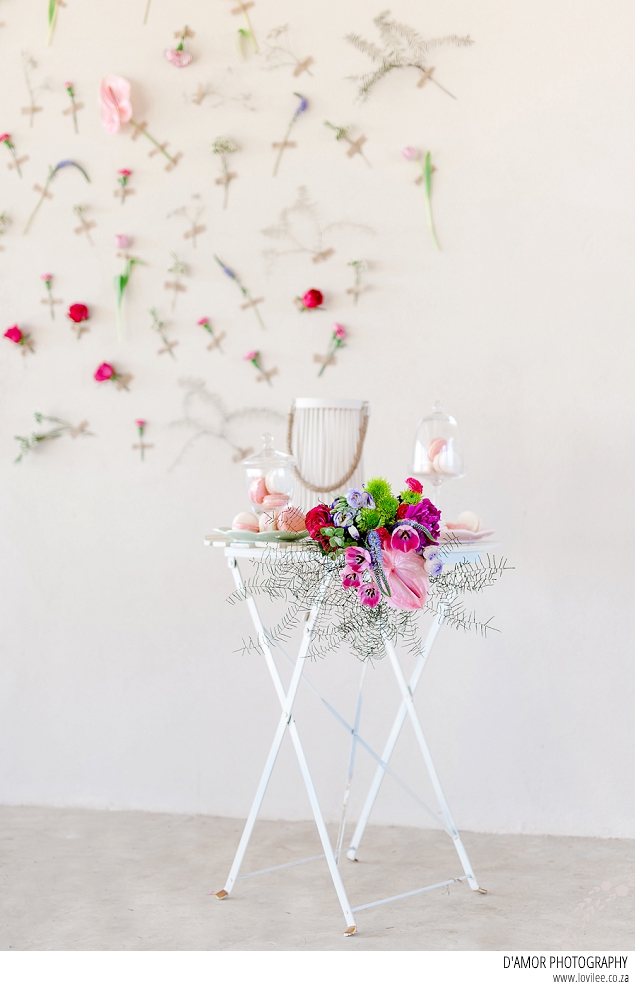
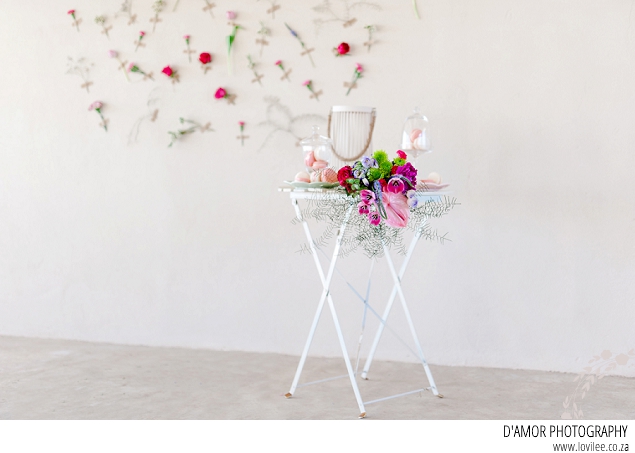
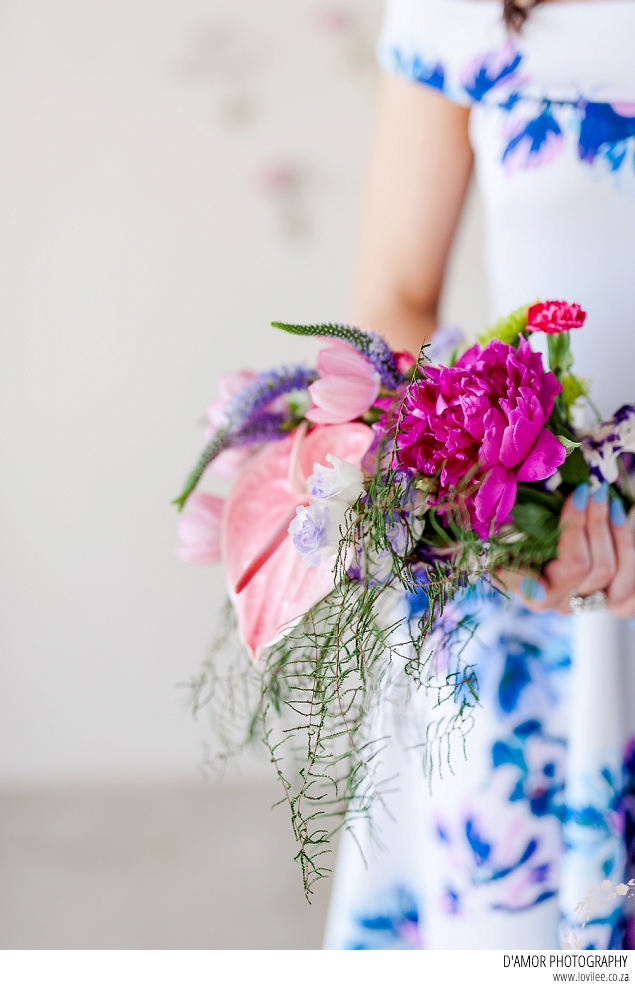
Neels and the team were very accommodating and confirmed that we were allowed to transform their white ceremony wall into a colorful flower DIY masterpiece. This wall also created the backdrop look. Being a bit daring regarding color Myrtle created a colorful, loosely tied, cascading bouquet filled with peonies, tulips, anthuriums, sprays and greenery. Together with a floral necklace. Décor used for this look and feel was a white able with a setting of small domes filled with macaroons. Carla and her granny used this opportunity for some bonding and made the macaroons themselves.
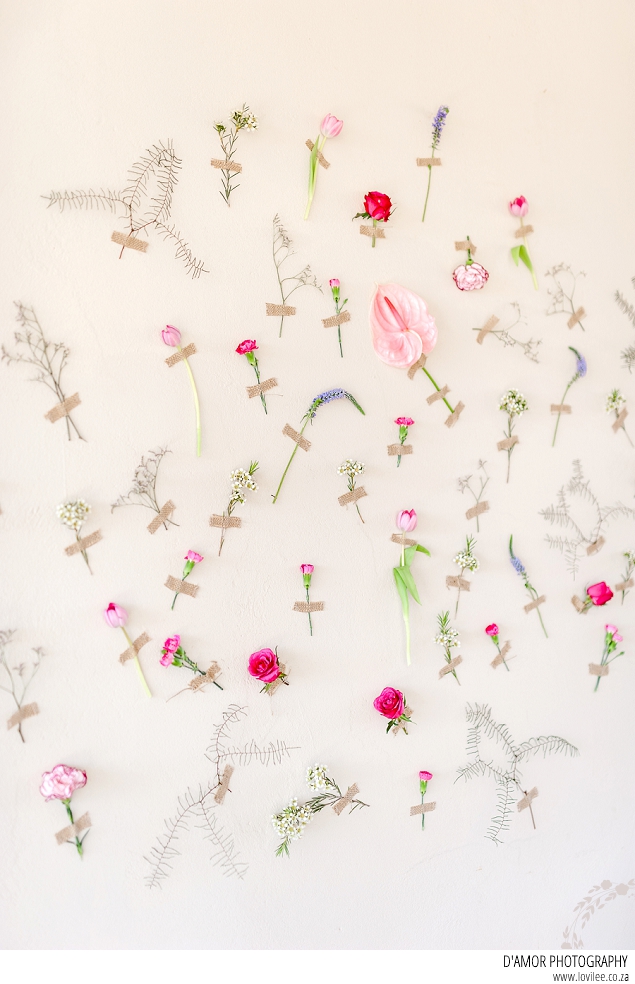

Steps to re-create this wedding flower wall
Creating a flower wall as wedding backdrop has never been this easy. It involved some DIY’ing on the actual wedding day, but trust me, it is all worth it. It provides for gorgeous portraits or even photo-booth backdrops. Depending on what kind of effect you’d like to create you can opt to either use washi tape or masking tape. Both these tapes are quite easy to remove from a painted wall with no damage. Although it is advised not to stick it to a newly painted wall and to still use caution when removing it. All you will need is:
- Fresh Flowers or plastic flowers (we prefer fresh)
- Scissors
- Pruning shears
- Washi Tape / Masking tape
How to?
- Cut the stems of the flowers shorter so that they are all more or less the same length.
- Position the flower on the wall and attach it with either washi tape or masking tape.
- Continue doing this until the wall space is filled.


Let's get social
Instagram: @lovilee_zaTwitter: @lovilee_za
Facebook: @lovileeblog
or subscribe to never miss out on any new articles in this link.


Comments are closed.