
So glad that the lovilee Catherine from the Caterham Design Co. agreed to do a step-by-step DIY leopard print watercolor tutorial for us! She previously shared an amazing watercolor wreath tutorial so I thought she’d be the expert on this. So here it goes…
Hi Loves! I’m so pleased to be back here with another DIY watercolor stationery tutorial for you. When I heard that this month’s theme is leopard print, I can tell you, I was in heaven! I’m endlessly happy with leopard print’s classy comeback into fashion. If Marc Jacobs can safely use this pattern in his packaging, then I think we could all use a little leopard print in our lives.
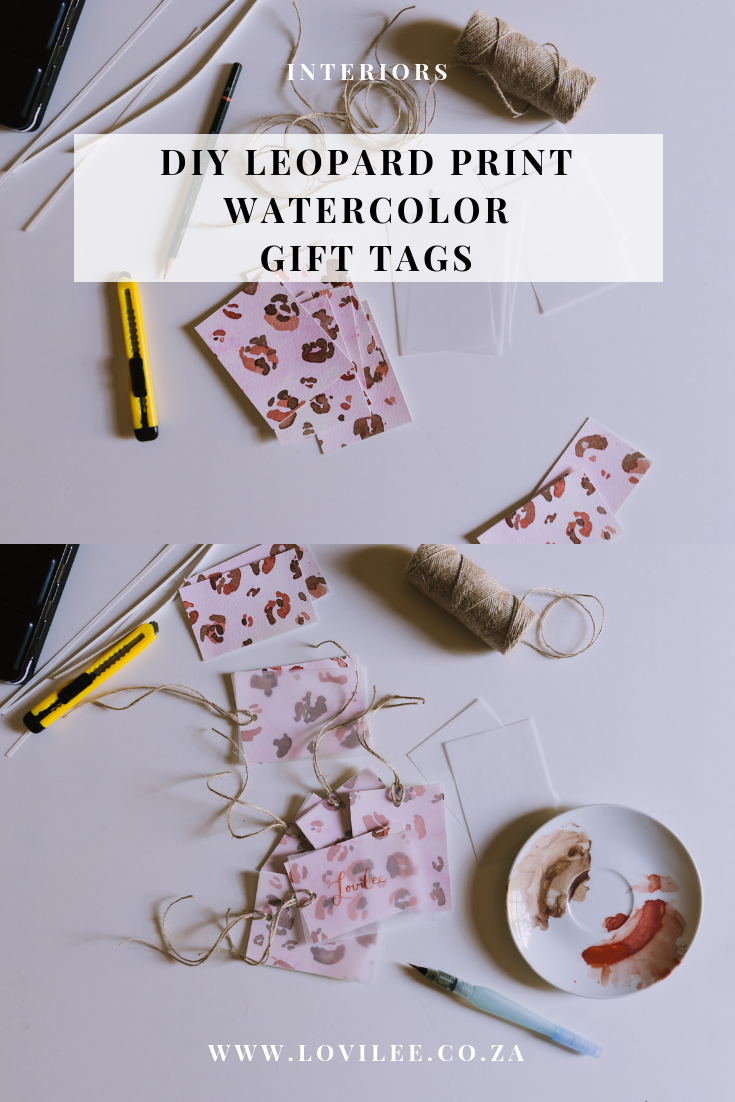
In this tutorial, I’ll be guiding you in painting your own leopard print pattern in my favorite medium of watercolour paint, and you can then use it to create your own gorgeous gift tags!
I can’t tell you how many photos of leopard skins I studied while researching this tutorial. So. Many. I was utterly flabbergasted when I realized how simple it would be to paint it after all that…
How To Paint A Watercolor Leopard Print Pattern?

What you will need
- Watercolour Paint. I’m using three colours in my painting. I’ve mixed a light magenta shade. Burnt sienna, and a darker mixture of burnt sienna and burnt umbra.
- 2 Jars of clean water. One for rinsing your brush and another to keep on hand for mixing paint or thinning it out.
- Paintbrushes. I’m using a size 16 roundbrush.
- Kitchen Paper. A watercolour artist’s no. 1 tool.
- Paint palettes. I’m a bit of a palette snob and prefer to use porcelain to mix paint (porcelain side-plates in this case), but anything will do!
- Watercolour board. I’m using a good quality watercolour paper for my tags. This way I know that my paper will not warp while I’m painting and then end results will have that luxury stationery feel.
- Masking tape
How to?
1. Start by mixing my background colour. I decided on a magenta that I thinned out quite a bit making it a very light wash of pink. Tape the paper down to your desk using masking tape. This will help prevent the paper from warping once wet (a proper way to do this would be to ‘stretch’ your watercolour paper, but this shouldn’t be necessary for this project).
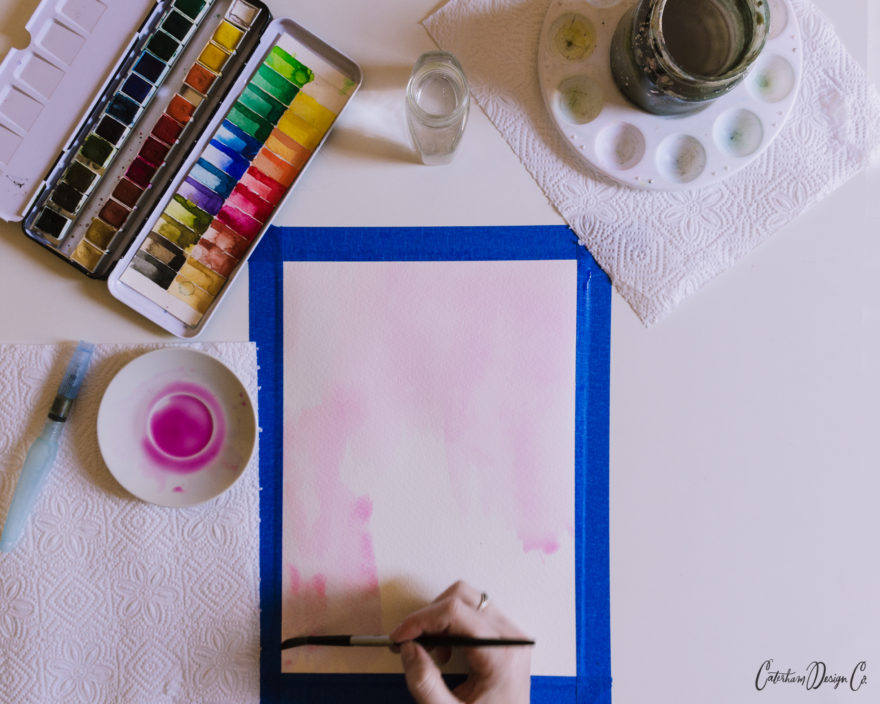
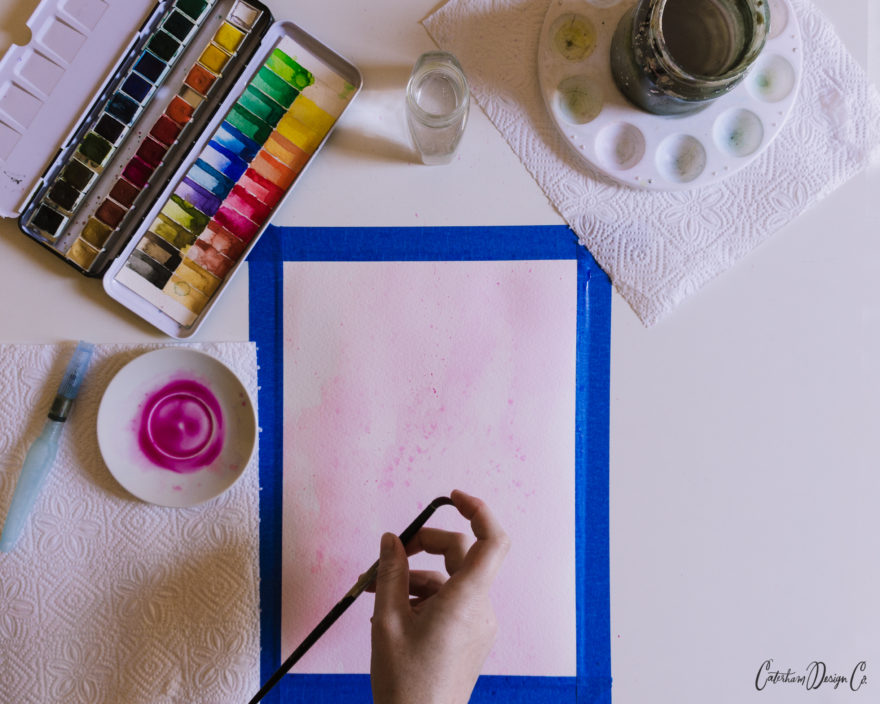
2. Once taped up, we can start painting! In watercolour painting, we always start with the light colours first and then progress toward the darker colours. This counts for backgrounds too. I’m starting here with painting in my light magenta-pink background, taking the paint all the way to the edges of the masking tape. Leave it to dry for a while. When the paint is mostly dry but not quite, I fill the brush with more paint and ‘flick’ some splotches on for texture. Wait for your background to dry completely.
3. Next up: leopard spots! We now get to use one of my favourite colours — burnt sienna. It took me a while to think of a verbal way to best describe painting a leopard’s spots, and I think I’ve figured it out. The starting shape that we’ll use is a bit like a kissy-lip-mouth sort of shape mixed with an almost ying-yang one. All I do to turn this base shape into a leopard spot is to make sure that the outside lines are not smooth but a little ‘bumpy’ or rough instead.
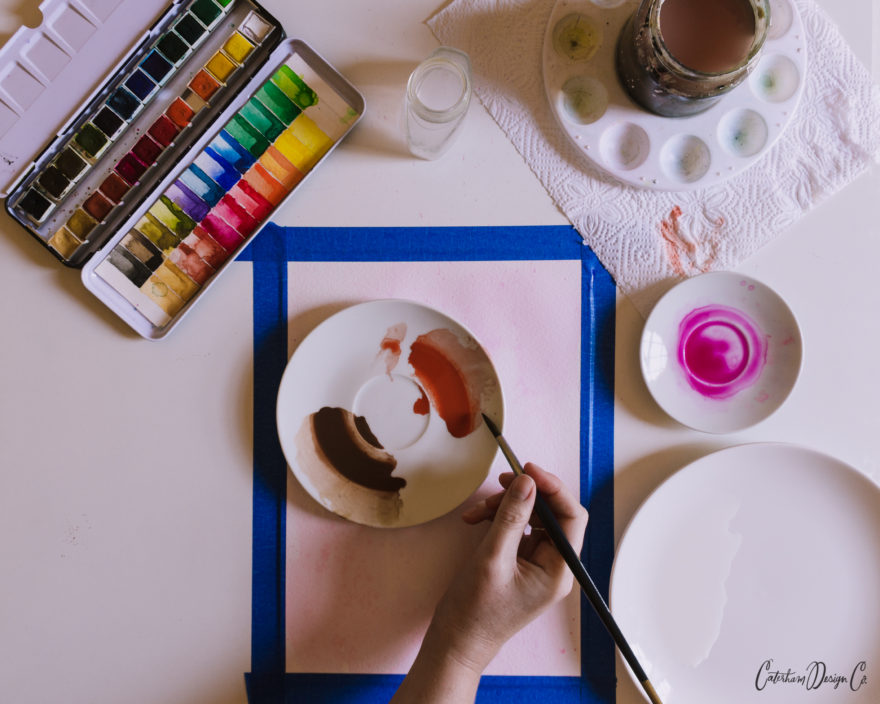
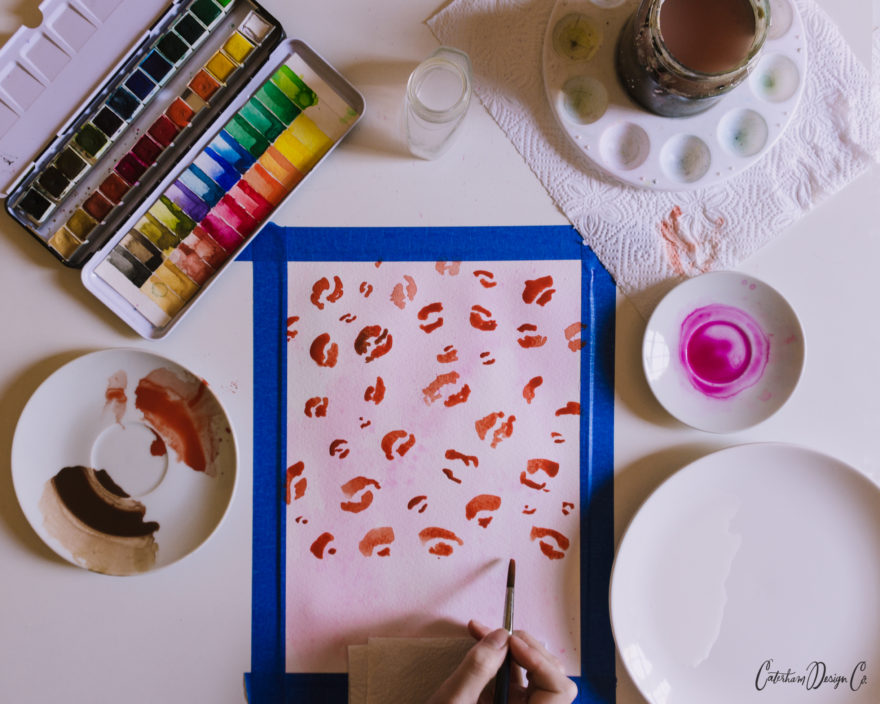
4. I’m using three different sizes for our spots — a little one, a medium sized one, and then one slighting bigger than the medium size. This will create a nice visual distinction in our pattern. Using a mixture of these sizes, paint in your spots, distributing the different sizes so that no one area stands out from the rest.
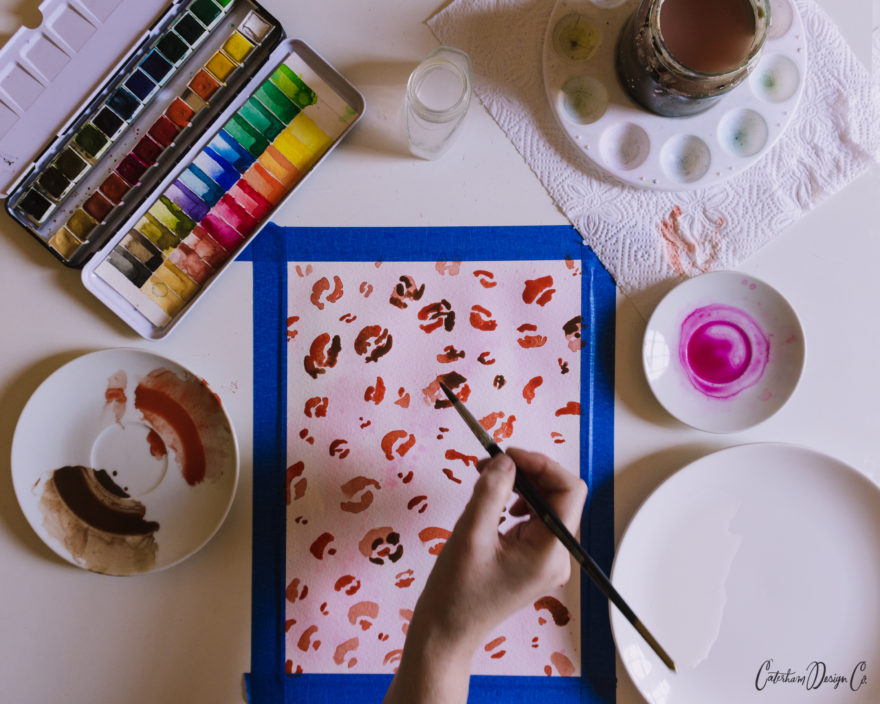
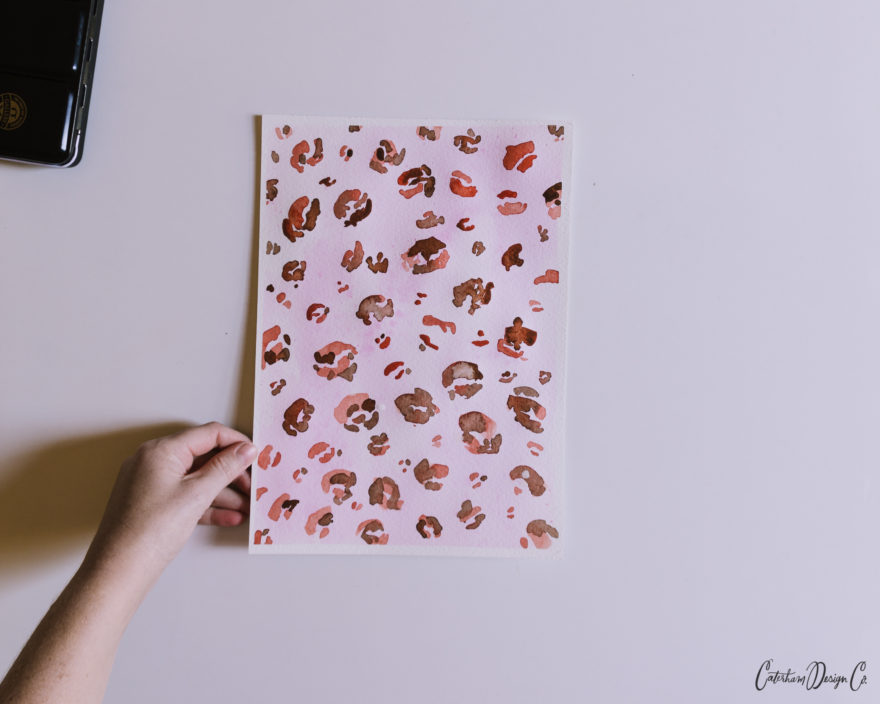
5. Once the page is filled out and the spots are mostly dry, we’ll start with the darkest colour. This part is completely random and I’m not sure of how to properly describe it. Begin by adding in some darker, but smaller, spots to your base shapes. Don’t be scared to add a few drops of darker paint into the wet parts of the base — these will ‘bleed’ into the burnt sienna, blending in nicely and creating a natural-looking spot. For the other spots, paint in some smaller spots in and around the bigger one to set it off. Or, alternatively, don’t paint it in at all, leaving it as the plain base shape for some contrast. When you’re done, let your painting dry completely.
How to make the gift tags
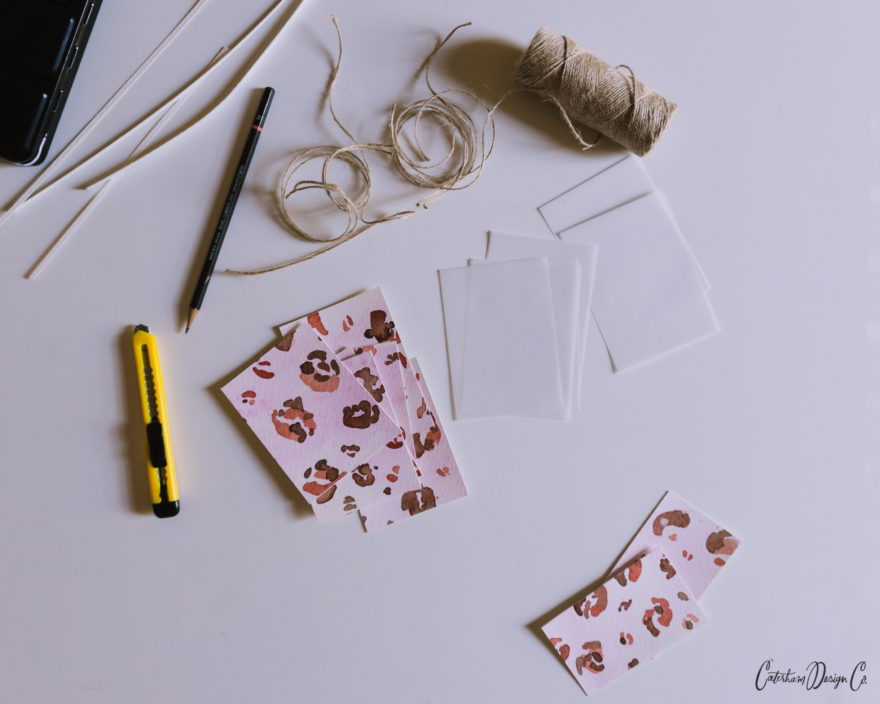
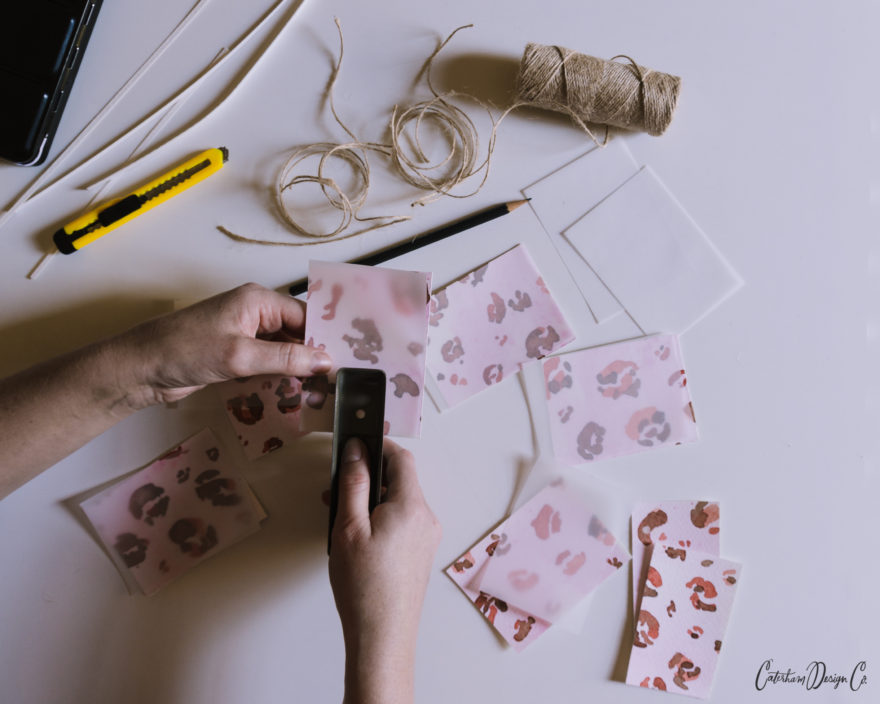
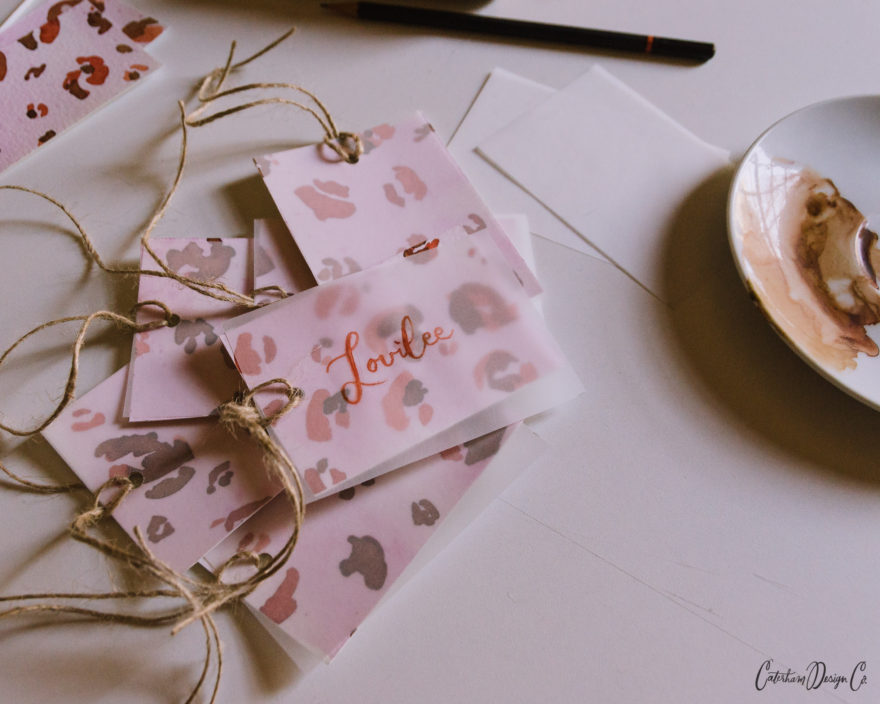
Now on to making the gift tags. I want a classy, high-end stationery feel to the tags, so I’ve chosen to match the thick watercolour board leopard print with a delicate, translucent vellum overlay and some thin sisal twine to complete the look. (You should be able to buy vellum from any good scrap booking store.)
Cut your tags into the size you want, I’ve gone for a nice, big A7 (105mm X 74mm) rectangle to accentuate the leopard print pattern. Once cut to size, place a sheet of vellum over the pattern and measure out the halfway point. Holding the two pieces of paper together, punch the hole through both and string the twine through to make a loop. You can now write a name or sweet message on the tag without having to cover the pattern!
And we’re done! I hope you’ve enjoyed this tutorial, and if you’ve followed along, please post your results on social media and tag me @caterhamdesignco I’d love to see what you’ve created.
Let's get social
Instagram: @lovilee_zaTwitter: @lovilee_za
Facebook: @lovileeblog
or subscribe to never miss out on any new articles in this link.


2 Comments
What a lovely DIY!
Dankie maiki!