
At the start of this year I set up some blogging goals. One of them was to prettify my Instagram Feed as it not really used for personal posts, rather for business. Earlier this year I posted an article on Instagrammers that I envy. I also wanted to have an account that I could be proud of, one that I would follow myself!
1. Decide on the look and feel you want – Aesthetics
Because my Instagram feed appears at the bottom of the blog it is essential that I had to get it to compliment the look and feel of what I was attempting to create. I played around with some ‘looks’ and looked back on the photos that I loved most and the ones that was getting the most ‘likes’ and feedback.
There are various looks that you could go for, they should compliment your brand. Looks could include:
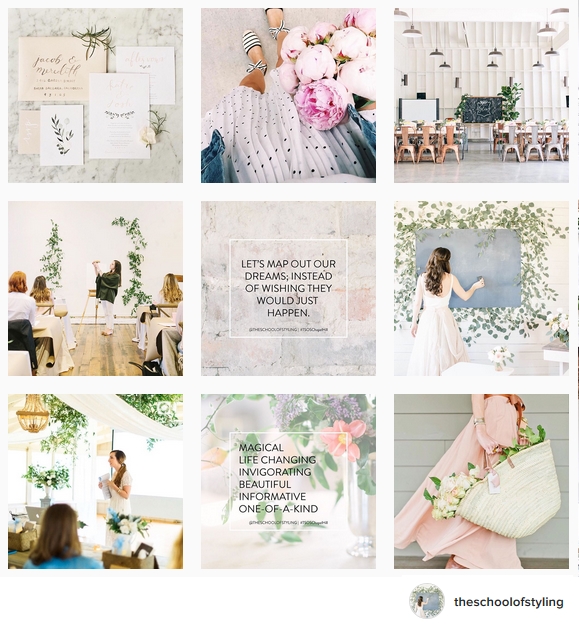
- ‘light & bright’
- ‘dark and moody’
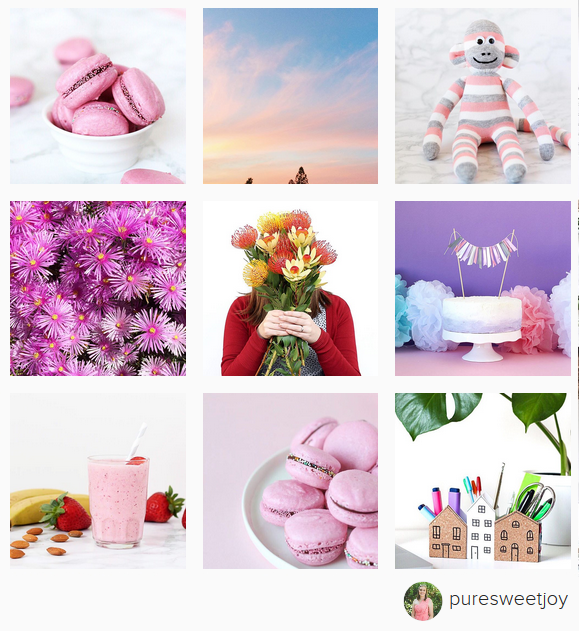
- ‘Pastel prettiness’
- ‘bright and colourful’

2. Look at the ‘big picture’
I realised that it was not just about sharing one awesome picture. It was about the whole feed looking great. Stand back, take a snapshot of 9 images for instance… How do they look together?
What helped me achieve this look was to add some lovilee quotes and text ever so often in-between the images. Note that if you want to use this I would advise that you post them so that the quotes either all appear in the middle of the three photo feed every time and not random. I also not prefer to create a ‘line’ / 3 photo look that compliments each other. e.g. use blues in 3 images after each other to create the look and feel I want.
3. Shoot your photos in bright light
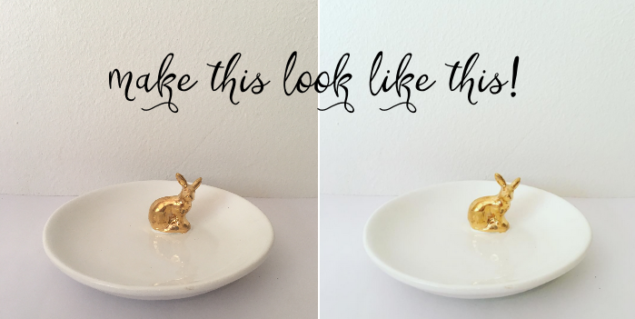
It is so much more difficult trying to make an image taken in bad light look like one that was taken in great light. Instead, just take it in good light and half of the ‘editing’ is already done. I prefer taking my images in the morning and have found a specific place in my house that I try to use. One with a white wall and I add a piece of white cardboard on the desk to get the ‘white’ look.
4. Edit your photos
Getting myself an iphone was the best thing I could do to get my images to look better. Not that I think this is the only way to get your feed looking pretty, but it somehow just takes great photos and makes editing really, really easy. I think getting any phone with a great camera could work. I edit most of my images for Instagram through the standard Instagram app, but am fortunate to also have great contributors to lovilee.co.za that already did most of the work for me.
It is important to note that if you do decide to make use of re-posting other people’s photos on your feed you need to credit them! There are apps that you can use to re-post images that will do the crediting automatically, but it is just good practice to always credit people when you make use of their hard work. You can either tag them in the image or in the image description. I prefer to do both.
In editing my own images, I have tried to move away from using filters too much on my images. I prefer editing them using the following settings:
- ‘brightness’ – I almost always brighten my images to try and achieve a whiter, cleaner look
- ‘warmth’ – I try to reduce the warmth taking some of the yellowness out of the images
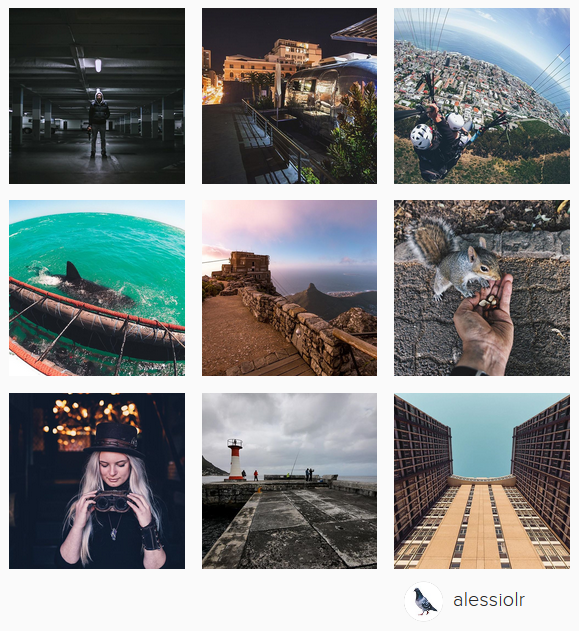
- ’tilt shift’ – I LOVE using this! But have had to try and stop making use of this function after reading this article by Alessio La Ruffa ‘Are you making the same Instagram mistakes that I did?‘. He was the runner up in the Africa top Instagrammer category at the Webfluential Blogger awards this year so he definitely knows what he is talking about.
- ‘sharpen’ – it is sometimes necessary to sharpen images. See my example above, I just sharpened the image slightly to create a better effect.
5. Think before you share
Because Instagram is such a ‘visual’ social media network it is important to stop and think before you post. It is important to take time to plan your content. Some questions you might want to ask yourself before you post an image:
- Is this an interesting photo that compliments my brand?
- Will this image fit into the ‘bigger picture’ of the feed look that I want to achieve?
I would LOVE to hear from you. Do you have tips and tricks that work for you? Please leave a comment below or offcourse on Instagram!
Let's get social
Instagram: @lovilee_zaTwitter: @lovilee_za
Facebook: @lovileeblog
or subscribe to never miss out on any new articles in this link.


1 Comment
Hi Kari,
Thank you, I love your tips and your feed is looking amazing!
It was also my goal to create a better Instagram feed, so high five on us both achieving it!